Monday 25 January 2016

Singer Featherweight 221 Sewing Machine Handy Hints

This blog is for all the new Featherweight owners out there, especially Paul who has just taken the plunge and bought one of these wonderful machines.

For those who don't know, this is my Featherweight.


So your Featherweight has arrived, what now?

Have a good look at the manual before you touch the machine.  If you haven't got one, click on this 221 Manual

Before switching it on, check the electric cords making sure they are not frayed or split, its a good idea to use a circuit breaker on these old machines.  Make sure that it is the right voltage for the Country you are in, USA is different to the UK for instance.  Check the foot control for cracks, remember it is made of Bakelite which is an early plastic and is brittle so don't drop it.  If when you switch on the machine and it runs on its own without you pressing the foot control, switch it off at the mains and take it to a qualified electrician/service engineer.

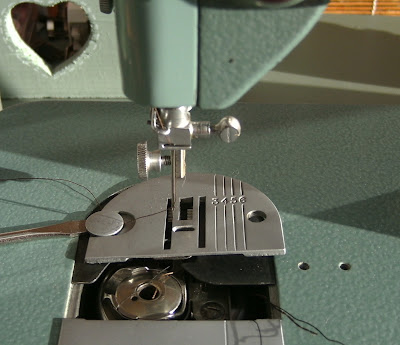
Have a good look around the machine, turn the hand wheel by hand to see if the needle goes up and down easily, check the belt isn't too tight or loose, if its frayed, order a new one.  Have a good clean using a lint brush around the feed dogs and around where the bottom bobbin goes in, have a good look for any jammed threads.

Check the manual to see where to oil it, only use Singer Machine oil and one drop in each oiling point.   I use a vintage Singer oil can for this, its tiny so easy to use.  Black Singer motors have lubrication tubes (the white ones don't have these tubes) which need filling with Singer Lubrication, don't what ever you do put oil down these tubes you will ruin the motor.

Only use a soft cloth on the paintwork, if its dirty you can use a couple of drops of Singer machine oil on a soft cloth to clean it, wipe don't rub (the decals can rub off easily). Buff with a clean cloth.  The paintwork chips easily so take care when moving it, I used to use large dressmaking scissors when cutting the threads but after clunking my machine with them a couple of times, now only use embroidery scissors with plastic handles around the machine.  Even chunky bracelets can chip paint.

Needle size is 2020 aka 15x1 and aka 130/705.  You can use vintage Singer needles, the ones from England, USA or Germany are the best ones, sometimes to later ones made in Brazil cause skipped stitches. If you can't get vintage ones Schmetz universal ones are the best.  The needle is inserted with the flat side on your left as you look at the machine and threaded right to left.  Needles come in different thicknesses, from 10 (for fine material) up to 16 (for tough material).

Featherweights can smell of old oil and can be quite stinky, there is a drip tray under the machine that has a felt panel to soak up the oil, this is made of pure wool and over time the oil rots it and it smells horrible.  New felt panels are available from http://april1930s.corecommerce.com/Parts-Manuals-amp-Service/Parts-for-the-Singer-Featherweight-221-222-and-301/Felts-Accessories/.  You might have to scrape the old one off with a flat blade, I used a wallpaper stripper.

The rubber feet on the bottom of the machine are often melted for some reason, these can be removed using the large Singer screwdriver on the screw directly in the middle of the pad.  You can buy new feet from  if you live in the UK http://www.singersewinginfo.co.uk/featherweight_parts/  and from April1930 (use the link above)  for USA owners.  Both these sites have loads of information on Featherweights.  Another good USA website is http://www.novamontgomery.com/index.htm  The rubber feet do leave black marks on hard surfaces which are tricky to clean off so I always put a cutting mat under mine so it doesn't mark the furniture.

If the carrying case smells of mould, you can put it in the baking sun (might have to wait for the summer to arrive) for a few days making sure that you support the lid so it can't blow over and smash the locks.

The Featherweights are great for free motion embroidery using a feed dog cover and a hopping foot.  But, and there is a but, the motor can overheat if you sew for a long time so short bursts are best and regular hand on motor to see if its hot.  STOP let it cool down.  I got carried away with mine once and it overheated which caused it not stop when I lifted my foot off of the controller!  Plug pulled instantly.  Scary, thought I had broke it but once it had cooled right down it was fine.


Have fun with your wonderful machines, if you take care of them, they will last.

Cheers
Sharon


Tuesday 19 January 2016

Singer 327k Low Shank Feet & Lifting Plate

Hello

Had an enquiry from Paul, asking what  type of feet fit the Singer 327.  Easy, the 327 is a low shank machine so you will be able to fit low shank Singer feet.

For those who don't know, nearly all Singers, especially the early ones were low shank which means the feet are quite short in height as the distance from the machine bed to the where the foot attaches is quite small. The feet measure 1 ins high.

A couple of the later Singers are high shanks (sorry not sure what the model numbers are), none of my machines are high shank but I do have an odd foot to compare the height of a low shank foot.  You can see the difference below.  The high shank foot  measures 1 1/4 ins high.


Just to confuse the situation even more, there is a Slant Shank Singer machine, the 301 was the first one made, this means that the shank on the feet (along with the needlebar) are at an angle, they slant backwards.

Below is a small selection of Singer low shank feet that will fit on the 327K.


One thing on the 327 is that instead of covering the feed dogs to enable you to do free motion embroidery, you lift the needle plate with either of these odd looking things, they both slip underneath the needleplate which disengages the feed dogs.


You will need a darning foot, I used the one off my Singer 221 which also fits the 201.  You could use a darning foot like the clear one below as well, they are much cheaper to buy than the little hopping foot.  The little rectangular plate is for covering the feed dogs on the Singer 221 Featherweight, this is a reproduction one which I got off Ebay, an original, if you could find one would be very expensive, the cheapest one I have seen was £96!


Sorry got side tracked, back to the lifting plates.  It slides under this holding pin, you can raise with a screwdriver or just slide the lifter under it from the right.


  Then the needle plate slides over the top.


The push the bobbin cover back, this will also raise up a bit as well.


Then off you go, the 327 is nice to free motion with, it goes steady away which is what you want.  You might have to adjust the height of the hopping foot, its adjusted by raising or lowering where it attached with the thumb screw.


The other style lifter fits like this.


Both of these lifters do exactly the same job so either will do. 

Helen Howes Sewing Machines have both of these lifting plates on her website http://www.helenhowes-sewingmachines.co.uk/quiltfeet.html  She has a really good selection of feet and machine parts as well.  She is based in the UK but will post world wide (full details on how to order are on her webpage).

I haven't used the 327K since I got the Singer 201 so it was nice to use it again so thanks Paul for your question.

Cheers
Sharon


Thursday 14 January 2016

Friendship Quilt & Basting Grid Review

Hello

A little while ago, the lovely Anita gave me a call asking if I would like to have her quilting equipment as she was giving up quilting.  Gosh!

I had no idea just how many wonderful things she would give me.  It was a overwhelming, rulers of every size and shape, huge cutting mats, needles, rotary cutters, quilting hoops, templates, batting and boxes of fabric, the list goes on.  After filling the car came home in a daze!

She had a complete quilt top that needed making into a quilt so as she had been so kind to me I said that I would finish it.  So as the weather is against me gardening wise, started on the quilt on Saturday

One of the really useful tools that she gave me was this nifty thing.  Its called a QuilTak Basting Grid.  I use a tag gun to baste instead of tacking but always found it a bit tricky trying to keep the quilt straight and flat while lifting it slightly so the tag gun needle goes through the fabric.  I usually lay the quilt on the carpet but often fasten the quilt to the floor.  This grid slides under the quilt and you just push the tag needle through without having to lift anything.  Brilliant.


My tag gun is called a Micro Stitch which I bought off Ebay.  I had a quick look for the grid but could only find one in the USA.  Not sure where you would get one in the UK.  Anita is a very experience quilter who traveled to America so I expect she brought it back in her luggage.


The quilt top was made by Anita's friends when she was poorly.   She pieced the centre and then it was passed around her friends to add to it.


What a wonderful job she did with the very impressive star and flying geese.

I quilted on the Singer 201 and added the binding.


Decided to call it Anita's Friendship Quilt so made my usual label for it.


Hope she likes it, completing it was just a small thing compared to her generosity.  She is such a kind person.

Update - got a pretty card off Anita, she loved how I had done the quilt.  Phew.

Cheers
Sharon

Monday 4 January 2016

Vintage Buttonhole Scissors

Hello

Firstly, Happy New Year to you all.

Over Xmas, I was given a vintage sewing machine to see if I could fix it but was missing its electrical lead and pedal.  It was made in Japan probably in the 1970s.  A replacement lead was over £30 if, and it was big if, I could find the right one.  So before I went on the hunt, I turned the machine over by hand, it did one rotation and then seized solid.  As I needed another sewing machine like I needed a hole in the head, this one went to the tip.  You just have to say no sometimes (the owner didn't want it back)

However, in its accessory box was a cute pair of scissors which I recognised as 'Buttonhole Scissors' but didn't a clue how they worked.  After a bit of research, here's how.


Notice the funny notch.


They are for cutting the slits for hand sewn button holes.  You use them by placing them against the edge of your fabric, the little gap is exactly the right distance from the edge for a small buttonhole.


 The blade cuts the same size slit for all your buttonholes.  Then you would secure the slit using a buttonhole stitch.

Some scissors come with a screw which adjusts the length of the slit.  I think these scissors are for children's clothes buttonholes because of their small size.

Not sure how old they are but they look late 19th or early 20th Century.  They do have a makers mark on them which is G. Butler & Co which were a Sheffield Company so they are English.

Not sure if I would ever use them, as I have the Griest Automatic Buttonholer for my Singer sewing machines.

Cheers
Sharon